There’s a nasty little problem that happens when you use hardware-accelerated textures to render sprites in a 2D game. The edges of your sprites, which look nice and clean in Photoshop, take on unsightly “ghost” outlines when the sprites are scaled, rotated, or drawn at non-integer coordinates. The outlines are fuzzy, blink in and out, and are painfully distracting! I ran into this problem in our first game, Cash Cow, and only now have I found a consistent way to fix it.
The Root Cause: Linear Interpolation
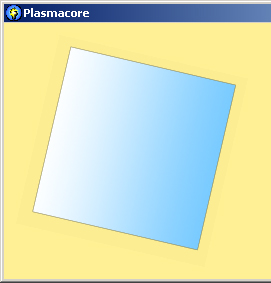
Let’s say we have a square filled with a gradient. It has a transparent border around it but no outline.

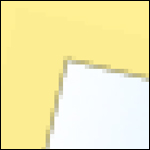
Drop this into a game with a little scaling and rotation and we see the problem. An outline has appeared where there was none before!
What causes this? Interpolation is the culprit. Graphics cards use interpolation to smooth out textures when they are scaled to keep them from looking pixilated. The color of any onscreen pixel is actually a blend of neighboring pixels on a texture.
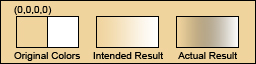
The issue arises with opaque pixels that border transparent pixels. In Photoshop, transparent pixels have an undefined color and are treated special during interpolation. With graphics hardware, however, transparent pixels still have a color, even though it is completely transparent. This color, at least in my experience, tends to be black, or ARGB(0,0,0,0).
When the graphics card interpolates a transparent pixel with a non-transparent pixel, the color of the transparent pixel gets mixed in.
The Solution: Color the Transparent Pixels
As it turns out, the solution is theoretically intuitive but not especially intuitive in Photoshop. The idea is to color the transparent pixels surrounding a sprite so that when they are interpolated with opaque colors, no unintended new colors are created. The problem is there’s no straightforward way to specify that transparent pixels should have the same color as the non-transparent pixels they’re adjacent to.
Here’s a solution that works well and is fairly quick:
1. Flatten your image to a single layer with transparency.
2. Create a duplicate of the flattened layer
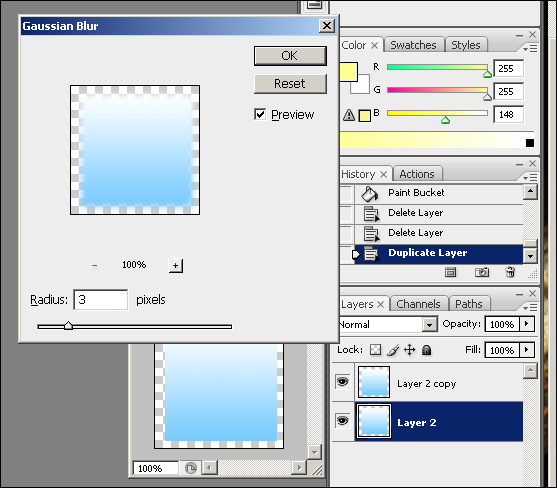
3. Add a 2 or 3 pixel Gaussian blur to the copied layer
4. Move the blurred layer behind the original layer
5. Set the blurred layer’s opacity to 1%
6. Save the image in a format that supports alpha (we use .png)
What we’re essentially doing here is creating an almost transparent halo of color around the image, so that when our edge pixels are blended, they’re blended with the correct color.
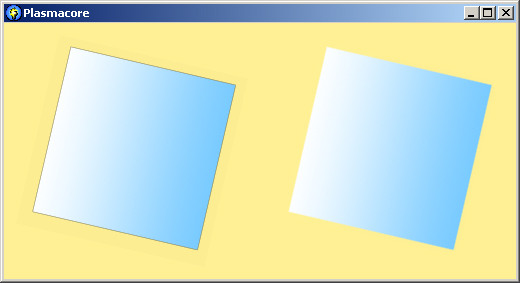
Demo
Here’s a demo of the problem and solution in action. The image on the left is unaltered and shows the outlines, the image on the right has been fixed using the process above and has no unintentional outlines!