
The Scripted Event System has saved me more time than any other idea I’ve ever had as a game programmer. We use it everywhere. It controls cinemas, runs AIs, executes visual effects, creates complicated character animations, and much more. By itself, it is a powerful and flexible system, but its true strength comes from how it works in conjunction with the Behavior System and Robot Functions.
What are scripted events?
In the Scripted Event System, a script is essentially an ordered list of actions. The actions in the script could be anything: moving an object around on the screen, shifting an object’s color from red to blue, commanding an enemy to move forward, etc. The point is that the actions are somewhat predetermined and execute in order, one after the other.
When the script is over (i.e., the queue of actions is empty), the script informs whatever object is listening for the end of the script. At that point, the listening object may add some more items to the script and have it begin running again, or it could start running another script, or take some completely different action. The system as a whole is very simple to implement and easy to use, once you understand how it works. That’s what this article is for!
Important Note
The Scripted Event System relies heavily on concepts explained in the Behavior System and Robot Functions articles. I strongly recommend that you read these articles first if you haven’t already. “Effects” are also part of the Scripted Event System, but for now, you can just think of Effects as objects that play an ongoing action, usually a visual effect. I’ll probably write an article on Effects soon.
Origins of the Scripted Event System
Coding Cinemas
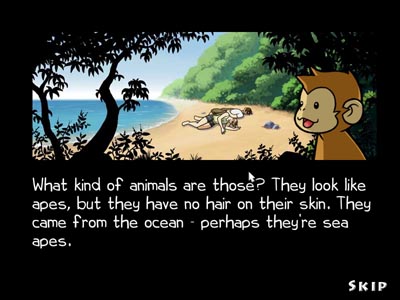
Early on in the development of Primate Panic, we knew we wanted to have some fairly complex cinematic scenes. As an inexperienced programmer, I had no idea how I was going to code them. I had never programmed a cinema before, and it seemed very difficult. So I tried to come up some ideas for how it could be done.
State Machine?
First, I thought maybe a large state machine could control each cinema. As events occur, they change the state of the cinema, and cinema would start running the new state. Each state could just be an integer, and the scene would determine which one is running in a switch statement. It seemed simple enough, but I knew it wouldn’t work long before I tried to implement it.
Complicated, longer cinemas have dozens, even hundreds of individual actions that occur in order. Coding all of these tiny states by hand for each cinema seemed like a monumental task, and it also didn’t seem very flexible. Each cinema scene would have to be an enormous class, have code for hundreds of tiny states, and would get unmanageable very quickly.
A natural extension of the idea would be to make each state an Object, and have it override an update() method. Then each cinema scene class would just have a reference to the currently running state and tell it to update. This would put all of the code in the individual state Objects, which sounded like a better idea. But this didn’t solve the problem of each state being so tiny. Even if I put several actions in each state to make them bigger, I would still need at least dozens of classes per cinema, all of which would grow more complicated by being tiny state machines themselves. And what about the fact that a lot of the states would do similar things, like say, run an animation, or move an object around? No, states as Objects just wouldn’t do either.
Starting With The Interface
Having spent a little while trying in vain to figure out how I could make a state machine work without each cinema taking weeks to program, I decided I needed to attack the problem from a different angle. So I asked myself the question, “If I had the perfect scripting system, what would my code look like when I was using it?”
This question instantly put the design in perspective. Instead of fumbling around with how the system might work, I started thinking about how I wanted to use it. I pretended that the system itself already existed, and started writing code with it in my head. One important thing I wanted to do was reuse my code for Effects and Behaviors in the cinema. Here is what I was thinking (code examples in Slag):
# Primate Panic cinema sequence

class AirplaneCinema

  PROPERTIES

  cinemaScript : Script
METHODS
method init():
cinemaScript = Script()
# Move the plane toward the middle of the screen
cinemaScript.enqueue(MoveBehavior(plane, 200, 50))
# Run a lightning effect that strikes the plane
cinemaScript.enqueue(LightningEffect(plane))
# Start thunder sound effect (instantaneous)
cinemaScript.enqueue(PlaySound(thunder))
# Start smoke generating from the plane's wing (instantaneous)
cinemaScript.enqueue(SmokeEffect(plane))
# The plane falls downward
cinemaScript.enqueue(MoveBehavior(plane, 200, 250))
method update():
cinemaScript.update()
endClass

The basic idea here is that the entire script is built in the constructor of the CimenaScene class, and all the scene does is run the script (by simply telling it to update() every frame). When a script element has finished executing, it is dequeued from the front of the script, and the next element runs automatically. Each command should only be one line long, even if it does something fairly complicated, like move an object around. Also, the script needs to be able to handle two kinds of members: 1. Members that run for several update cycles, leaving the script when they are done, and 2. Members that execute some arbitrary code and leave the script in the same update cycle. In this example, the script elements that move the plane around would operate over several updates, while starting the thunder sound effect would be instant.
Now I knew what I was shooting for, although it seemed impossible at first. The interface that I wanted sounded so great–it could handle really diverse actions, and they would be added to the script in just one line of code each. It would be very easy to change the order of the script, since all you’d need to do is change the order of the instructions. And because the script is implemented as a queue, it handles the control flow between script elements automatically.
And the best part is that it would work with the Behaviors and Effects that I have already written. Why write a new script action that plays a lightning effect when I already have a lightning Effect class? Or why write a script element to move an object to a specific point when I’ve already written the Behavior for this? (Actually, simple movement is accomplished more efficiently using a Robot Function than a Behavior, but when I first started the Scripted Event System, Robot Functions didn’t exist yet).
But was this actually possible? Could I keep the code for the script as condensed as my example without sacrificing the flexibility of the scripts? It turns out that all of this is possible, and although it took some time to figure out the solution, it’s very easy to implement.
Uniting Behavior, Effect, and RobotFunction
First I had to figure out how I would be able to put Behaviors, Effects, and RobotFunctions all into the same script. It seems like these three objects all work totally differently, right? Actually, they are more similar than I thought, at least in a few key ways. They all have an update() method and they all have listeners (of some sort). This is all the script needs to know, since all the script does is call their update() method and sets their listener to be itself. So to tie all of them together, we can have them all incorporate a simple aspect, ActionEvent (if you aren’t familiar with Slag, just think of an aspect as a Java interface for this example).
underlying aspect ActionEvent

  METHODS

  method update():

  method setListener(ActionListener listener):

endAspect
underlying aspect ActionListener
METHODS
method callback(ActionEvent caller):
endAspect
# This code represents the new type declarations,
# which would show up elsewhere
abstract class Behavior : ActionEvent
abstract class Effect : ActionEvent
abstract class RobotFunction : ActionEvent
Okay, so now we’ve established that Behaviors, Effects, and RobotFunctions can all operate the same way in a script because they all incorporate ActionEvent (implementing the update() and setListener() methods). The ActionListener aspect, which our script incorporates, allows our script to listen to the event callbacks from the ActionEvents.
On to the next problem: our script doesn’t just need to support ActionEvents, it also needs to be able to handle commands that execute instantly. These commands can be any arbitrary code. The lazy way to accomplish this would be to make a fourth kind of ActionEvent that only runs for 1 update cycle, and immediately notifies its listener that it is done. But that seems a hack, since if the command runs for an entire update cycle, then 10 commands in a row will take 10 updates, which isn’t quite what we want. This would completely throw off the timing of the script.
Commands Are Different
Instead, why not make a new class, called a Command. Specific Commands override one method, execute(). When the script encounters a Command, it just calls the Command’s execute() method and moves on. If the script encounters multiple Commands in a row, it processes them all at once in a while loop until the script is empty or it encounters an ActionEvent. Simple enough. Special note: in Java, you can declare, create, and add Command objects to the script as anonymous classes, keeping the code very compact and readable.
But how does a script hold both Commands and ActionEvents? How does it know which one to run? Well, since a script is implemented as a queue, it doesn’t hold the Commands or ActionEvents directly, it actually holds ListNode Objects, which in turn knows the type of its data. But of course, that just passes the problem on to the ListNode class.
Two Node Types
All we have to do is make the ListNode a little bit more complicated than usual. ListNode becomes AbstractListNode, which has two children: EventNode and CommandNode. You can probably see where this is going. EventNodes hold data of type ActionEvent, and CommandNodes hold data of type Command. How does the script tell between the two kinds of Nodes? A simple int value called nodeType in the AbstractListNode class. For EventNodes, the nodeType is set to 0 in the node’s constructor, and for CommandNodes, the nodeType is set to 1.
All of the pieces are in place. The script is a queue of AbstractNodes, and it can figure out which kind of data the Node holds. Here’s is a simple version of what the script’s update() cycle looks like:
method update():

  while (firstNode().nodeType == COMMAND_NODE)

    # cast operation

    local CommandNode c = firstNode().(CommandNode)

    c.data.exectue()

    dequeue()

  endWhile
if (firstNode().nodeType == EVENT_NODE)
# cast operation
local EventNode e = firstNode().(EventNode)
e.data.update()
endIf
# if the script is over, inform the listener
if (firstNode() is null)
listener.callback(this)
endIf
method callback(ActionEvent e):
dequeue()
if (isEmpty() == true) listener.callback(this)
There are a few ‘null’ checks missing here, but this shows the basics. The update() call executes all of the Commands at the head of the queue first, then moves on to the ActionEvents, calling update() just once on the first one. If there aren’t any commands at the head of the queue, it won’t execute any Commands, and will just update() the ActionEvent at the head of the list (if one exists).
ActionEvents and callback()
In this code, we can see how the CommandNodes are removed from the queue during the while loop, but what about the ActionEvents? These are handled slightly differently, since we don’t know when the ActionEvent will be done. The script, as an ActionListener, implements a callback(ActionEvent) method. When the Behavior/Effect/RobotFunction is finished, it invokes the method “listener.callback(this).” “this” is the caller (e.g., the behavior), and “listener” is the script.
ActionEvents and Commands are added to the script in the script’s enqueue() method, which is also when the node is built to hold them. When an ActionEvent is added to the script, the script sets the ActionEvent’s listener to be the script itself. When the script hears the callback() method from an ActionEvent, it invokes dequeue(), removing the calling ActionEvent from the head of the list. If the queue is now empty, the script in turn informs its own listener (which might be a menu, an enemy, a cinema, or whatever Object contains this particular script), by invoking listener.callback().
Let’s review what we have so far. The Script class (which I refer to as an ActionQueue in code), can enqueue ActionEvents and Commands to a list. When it updates, it executes all of the commands at the beginning of the queue right away, then calls update() on the first ActionEvent it encounters. This ActionEvent could be a Behavior, an Effect, or a Robot Function. ActionEvents are removed from the head of the queue when they inform the script that they are done running, through the use of a callback() method. Once the entire script is done, it informs its listener, also by using a callback() method.
Scripts alone aren’t enough
Here’s what we are lacking with just straight scripts: we can only have 1 action running at once in the script, and sometimes several events need to happen at once. For example, let’s look at the cinemas in MadStone. When you beat a level, the MadStone performs its animation as it moves down toward the ground, and once it gets the there landscape starts flooding with color as the MadStone sinks from view. Right now, let’s just look at the first part of the cinema: The MadStone begins to move down as it plays its animation. The animation finishes, and shortly after, the MadStone actually hits the ground, setting off another series of events.


The problem here is that with just scripts, you can have the MadStone move downward OR have it play its animation, but not both at the same time. This is because the script has no way of knowing that you want to run two ActionEvents at the same time, it just always runs them in order. One way to get around this would be to combine its moving down action with its animation action into a single Effect (maybe call it MoveAndAnimateMadStoneEffect) and have the script run that, which would work just fine. Why don’t you want to do this? Because your complicated cinemas are going to have dozens of these cases where you need to combine several Actions into a single item in the script. This would mean you are writing dozens of tiny, almost pointless classes to combine your effects. Changing the order and timing becomes a real pain as well.
Solution: ActionList combines several ActionEvents
What we need is a way to combine several ActionEvents so that they can be treated as a single ActionEvent by the script. The solution is to create an ActionList class. This is exactly what it sounds like, but with some important extra features. ActionList, just like ActionQueue, contains a list of ActionEvents. The difference here is that instead of treating the list like a queue and only running the first item in the list, the ActionList calls update() and redraw() on all of its members every frame. This means you can have several Behaviors, Effects, and RobotFunctions all acting in the same ActionList at once.
But how does this help us solve the queue issue we were talking about earlier? How can we treat an entire list of Behaviors/Effects/etc. as a single queue item in the script?
ActionList incorporates ActionEvent, ActionListener
Just like RobotFunctions, Effects, and Behaviors, ActionLists incorporates the ActionEvent aspect. All this means is that you can call update() and setListener() on it. The update() method updates all of the members in the list. When an ActionList is a member of a script, this allows all of the ActionEvents in the list to update() as if we were just dealing with one ActionEvent. The setListener() method guarantees that when an ActionList is inserted into a script, the script can set itself to be the listener of the ActionList, just like it does when you put a single Behavior or RobotFunction into the script.
ActionList also needs to be an ActionListener so that it can hear the callbacks() of the members in the list. This way it can figure out when the members of its list are done running and can inform the script.
ActionList and callback()
Now the question is, how do we deal with the callback() from an ActionList? With a single ActionEvent, the solution is obvious: it invokes “listener.callback(this)” when it is done running. But how do you decide when a list of several ActionEvents is done running? Is it when the first one is done? Not quite. Remember in the example from above, the MadStone finishes its animation before it is done moving, and we don’t want the script to move on yet. Is it when ALL of the elements in the list are done running? Not necessarily. Imagine that we wanted to change how the MadStone cinema worked so that the animation plays in a loop while the MadStone sinks down. This might happen if you wanted say, the pumpkin MadStone to laugh continuously while it was sinking. One of the ActionEvents needs to repeat constantly, and the script only moves on when the other ActionEvent is finished.
Set listener during node insertion
What we need to be able to do is tell the ActionList which callbacks to be listening for. When an ActionEvent is added to an ActionQueue (script), the ActionEvent’s listener is set to be the script itself. However, with an ActionList, we only want to listen to certain callbacks. All we need to do is add one extra boolean parameter to the insert method, listenToCallback. This will tell the ActionList whether or not it should set the ActionEvent’s listener to be the list when the ActionEvent is added to the list. In the case of the laughing pumkin example, the AnimationBehavior would be added to the list without setting its listener, but the RobotFunction that moves the pumpkin would have its listener set to be the list.
ActionList calls back at first chance
Now we can group together several different ActionEvents (Behaviors, Effects, RobotFunctions, etc.) that all update() with a single call. They are all treated as a single ActionEvent so that they can be added to a script. And some of them will invoke listener.callback() when they are done running (where “listener” here is the ActionList). Whichever ActionEvent invokes ActionList.callback() first will then cause the ActionList itself to invoke listener.callback(). The ActionList’s listener may be another ActionList, some other Object that is interested, or a script. The main purpose of this discussion was to examine the case when the ActionList’s listener is a script, so let’s see what happens now.
Finally: an ActionList as a script element
The first ActionEvent to invoke callback() on the list causes the list to invoke callback() on the script, and the script moves on just like it would with any normal ActionEvent. Finally, we can solve the problem of the laughing pumpkin MadStone very easily:
ActionQueue script = ActionQueue()
RobotFunction mover = RobotFunction...
AnimationBehavior laughAnim = AnimationBehavior...
ActionList animList = ActionList()
animList.add(mover, true) # listen to this callback
animList.add(laughAnim, false) # ignore this callback
script.enqueue(animList)
It will start moving, start laughing, and laugh until it hits the ground, at which point the script will continue with whatever is next.
Auto-remove passive ActionEvents
Of course, ActionLists aren’t just useful in scripts. One of their most common uses is as an ongoing list of Behaviors or Effects, where you just throw an Effect into the list as it is created. The effects in the list run, and remove themselves when they are done running. The easy way to accomplish this is to add a little bit more to the ActionEvent aspect: a getter and setter for an “active” boolean. If an ActionEvent is not active (meaning it is done running) just remove it from the list. ActionEvents will set this flag on their own as they run.
Type summary
There is a lot of complicated typing going on here, so let’s review what we’ve got before moving on. In this case, Slag aspects are being used just like Java interfaces. They require that implementing classes have the method stubs of the aspect.
underlying aspect ActionEvent

underlying aspect ActionListener
abstract class Behavior : ActionEvent
abstract class RobotFunction : ActionEvent
abstract class Effect : ActionEvent
class ActionQueue : ActionEvent, ActionListener
class ActionList : ActionEvent, ActionListener
Note that some instances of Behaviors and Effects may also be ActionListeners, depending on what they do.
Benefits of this type structure
Two of the most important things to see from this are that ActionLists and ActionQueues (scripts) are themselves ActionEvents. This means that you can put a script into an ActionList, an ActionList into a script, a script into a script, and an ActionList into an ActionList. All of these features combined make the system extremely flexible and easy to use. In fact, I frequently use all of these features when designing cinemas or other scripted events.
And you’ll never have to worry about type safety, since you have taken care of it all using aspects. The only time casting is required in the whole system is when the scripts have to decide whether to execute() a Command or update() an ActionEvent. You could probably even get around this one cast operation if you wanted, it’s just an implementation decision.
Now that we’ve covered what the Scripted Event System is and how it works, it’s time for the payoff: what it can do.
Since cinemas were the original reason that I designed the system, let’s start there. Looking back at the example from MadStone. , we can divide the first chunk of the cinema into two parts. First, the MadStone plays an animation as it moves toward the ground and fades halfway. Then, as the MadStone touches the ground, the background lights up and the MadStone finishes sinking while fading away completely. We’ll build each part individually and then combine them in the script.
Part 1- Fall + Animate
# This ActionList is the first part of the script.

# The MadStone sinks using a RobotFunction and starts

# to fade using a RobotFunction on its alpha. An

# AnimationBehavior causes the MadStone to play

# its animation one time. The whole thing ends when the

# MadStone touches the ground (in 3 seconds).
local RobotFunction fall1 = SlideFn(mad.yPtr, 280, 3, this)
local RobotFunction fader1 = SlideFn(mad.alphaPtr, 125, 3, this)
local AnimationBehavior animator =
AnimationBehavior(mad, mad.anim, 0.22, null)
local ActionList part1 = ActionList()
part1.addFirst(fall1, true)
part1.addFirst(fader1, false)
part1.addFirst(animator, false)
Part 2- Fade + Lighting
# This ActionList is the second part of the script.

# It "lights up" the dark blackground image by turning

# up its RGB values from 0 to 255 using RobotFunctions.

# At the same time, the MadStone slides into the ground

# and fades away (using RobotFunctions on its y value

# and alpha). The script ends when the MadStone has

# finished fading. All of this happens in 3 seconds.
local RobotFunction fall2 = SlideFn(mad.yPtr, 364, 3, this)
local RobotFunction fader2 = SlideFn(mad.alphaPtr, 0, 3, this)
local ActionList part2 = ActionList(null)
part2.addFirst(fader2, true)
part2.addFirst(fall2, false)
part2.addFirst(SlideFn(fground.rPtr, 255, 3, null), false)
part2.addFirst(SlideFn(fground.gPtr, 255, 3, null), false)
part2.addFirst(SlideFn(fground.bPtr, 255, 3, null), false)

Putting it into a script
# We have parts 1 and 2 of the script, both of

# which are ActionLists. Now we just need to put

# them together, in order, using a script.

# The script should start with a sound effect

# Command that plays the sinking tune while

# the script is running.
local ActionQueue script = ActionQueue(this)
script.enqueue(PlaySfxCommand(Sounds.Sink))
script.enqueue(part1)
script.enqueue(part2)
Incorporating it into the cinema
We’ve now got the code for about 6 dazzling seconds of cinema, and it didn’t require us to write any special RobotFunctions or Behaviors. But how does it all work in context? What do we do with these code snippets? Well, how you organize and connect the pieces of a cinema is up to you, but I’ll show you how I did it here.
All of the parts of the cinema that we have done so far are closely related: they represent the chunk of the cinema when you defeat the MadStone and it “restores tranquility” to the area. The next chunk of the cinema is totally different–the landscape starts to move, and you go to the next area, meeting your future opponent. Since the first part is all so related, I decided to make that an Effect object (called TranquilEffect) that would represent one chunk of a larger script. Here’s the basic layout of the cinema as a whole:
-CinemaScene class declares master script.
-Master script is composed of a couple large chunks.
-CinemaScene runs master script.
-Master script item 1 is a TranquilEffect.
-TranquilEffect runs a script of two parts (which we just wrote).
-When the script is done, it invokes callback() on its listener, which is the TranquilEffect.
-TranquilEffect then invokes listener.callback() as well, where its listener is the master script.
-This callback triggers the master script to move to the next chunk.
That’s all there is to it! The whole cinema process is just a matter of combining tiny pieces into bigger and bigger pieces until the whole cinema is done. You start with your smallest pieces, ActionEvents (Behaviors, RobotFunctions, and small Effects). You put these together into ActionLists or larger Effects to make script pieces. Once you’ve got all the parts of the script written, you choose how to organize them and combine the entire thing into a cinema. Remember, a whole script can be just a single item in another script. This gives you an easy way to divide up long cinemas.
Although we just saw how the Scripted Event System works in conjunction with Behaviors and Robot Functions, we haven’t really seen the true power of this union yet. Behaviors and Robot Functions were not originally written to be used in cinemas, they were meant to let you share very diverse functionality between unrelated objects. For example, your save menu uses the same RobotFunction to fade out as your defeated enemies, your monkey uses the same Behavior to animate as your MadStones, etc. This allows you to create totally new, high-functioning objects in the game or in the GUIs quickly and easily by building them with a shared code base of Behaviors. This usually covers a great deal of their capabilities for free.
Now we’ll look at the other places Behaviors and Robot Functions are normally used and see what the Scripted Event System brings to the table.
Scripts for GameObjects
I quickly realized that this system had great uses far beyond just cinemas. All sorts of objects in the game could benefit from scripts just like they benefit from Behaviors. One of the first uses I thought of was applying the Scripted Event System to the monkeys’ actions in Primate Panic, such as fruit picking. When you throw a monkey and it touches a piece of fruit, a few things happens in quick succession. Here are the important ones:
1. The fruit is logically removed from the grid so that it can only be picked once.
2. The monkey quickly slides to align itself with the grid square of the fruit.
3. The monkey shakes the fruit up and down.
4. A sound effect starts to play.
5. A “dew drop” visual effect starts to play.
6. The fruit starts to fall.
7. The monkey decides what to do next and hops off the fruit.
Replacing Old State Machines
Just like my first idea for a cinema, my first idea to accomplish this fruit picking action was to use a state machine. The difference was that there were only about 7 actions that needed to happen when a monkey picked a fruit, as opposed to dozens or hundreds for a cinema, which is why the state machine worked reasonably well. Still, the code was fairly complicated, tough to read, and reproduced in large part when the monkey performed similar actions. This all seemed like bad design.
The Scripted Event System was a perfect fit. Instead of using several states with unrelated commands thrown into each, all I needed was a script. Here’s a much better way to do it in pseudo-code, improved just a bit from the way I actually coded it:
# Create a script where the listener is the monkey

local ActionQueue script = ActionQueue(this)
# The two movement RobotFunctions (x and y) are combined
# in an ActionList. The two robots finish at the same
# time, so we'll just listen to one of them.
local ActionList sliderList = ActionList()
local RobotFunction xMover = SlideFn(monkey.xPtr ...)
local RobotFunction yMover = SlideFn(monkey.yPtr ...)
sliderList.addFirst(xMover, true)
sliderList.addFirst(yMover, false)
script.enqueue(ClearSquareCommand(fruitCoords))
script.enqueue(sliderList)
script.enqueue(ShakeBehavior(this, fruit)
script.enqueue(PlaySoundCommand( SOUNDS.pick ))
script.enqueue(PlayEffectCommand( DewDropEffect() ))
The Scripted Event System made the fruit picking actions much simpler to code, more flexible, easier to read, and far fewer lines than my state machine version. The last 5 lines of code correspond directly to the first 5 actions of the description we saw earlier. It would be tough to represent the five actions much simpler than that.
I like this example because it also leverages one of the most important aspects of the system: that ActionLists can be part of scripts. In this case, we just used two Robot Functions to slide the monkey on to the grid square. Since the two functions have to operate at the same time, we encapsulate them into an ActionList and just listen to one of the callbacks.
The system is not a straight jacket
You might be wondering about the last two steps (the fruit falls, and the monkey decides what to do next before jumping off the fruit). Of course, you could handle both of these using commands and put them at the end of the script. However, this isn’t really necessary. It’s much simpler just to have the monkey listen for the end of the 5-part script (which it is already) and then perform those last two actions on its own, in reaction to the script ending. I personally prefer this way because the commands that would correspond to those last two actions are very specific and depend on a lot of context (particularly the second one). Why make complicated commands that you don’t plan to reuse anywhere else when you can easily avoid it?
The Scripted Event System is all about convenience. If some actions are easier to implement outside of the script, put them there! Often times, there are many different ways to apply the Scripted Event System to the same task. How you choose to organize the parts of the script, the complexity of each item in the script, and what happens outside the script is all up to you. Finding the way that suits you best is an art form. It’s actually a lot of fun! The Scripted Event System provides you with a bunch of new options, and you just pick the one you like the best.
Since it has such a diverse range of uses, I’d like to give you a feel for some of the other places we harness the Scripted Event System. Hopefully you’ll be able to see how you might be able to apply it to totally new cases in your own games.
MadStone AI
The computer in MadStone does a few things: moves the cursor, waits, strikes a block, and shakes. Every time it moves or strikes a block, it waits at least a fraction of a second afterward so that it doesn’t play at superhuman speeds. Sometimes the situation calls for it to do a short series of moving, waiting, and striking.
Even though the application of the Scripted Event System is simple here, it works really well for what it does. The idea is that since the computer’s actions are performed in a specific order, it made sense to just throw the computer’s actions into a script as it played. At any given moment, the script would be tiny: maybe just a strike command then a wait action. But when the script was over, the computer would hear the script’s callback and know that it needed to decide what to do next.
Execution example
Let’s say the AI script starts empty. Here’s basically what the computer is thinking while it plays, and what is going on with the script:
[Computer decides what to do next]
script.enqueue(MoveCommand(UP))
script.enqueue(Timer(0.4))
[script finishes, invokes AI.callback()]
[Computer decides what to do next]
script.enqueue(StrikeCommand())
script.enqueue(Timer(0.4))
script.enqueue(MoveCommand(LEFT))
script.enqueue(Timer(0.4))
[script finishes, invokes AI.callback()]
[Computer decides what to do next]
...
The advantage of using scripts here is that you get an easy way to execute short segments of planned activity in order, without any additional control structures. But unlike a cinema, you can’t build the whole script at once. This is for two reasons: 1. The script is potentially endless, depending on the length of the game, and 2. The AI must adapt to changing conditions every couple of actions. Luckily, it’s no problem to build the script over time.
The computer builds up the script again each time the current script finishes running (which is when it hears the script’s callback). In a cinema, the script’s listener only hears the callback() from the script once, meaning the cinema is over. Here the callback can occur several times a second, each time pushing a few more items into the (newly empty) script, and telling it to run again.
More examples
All of these examples should be similar enough to ones we’ve already looked at for you to have the basic idea of how the Scripted Event System would apply:
-Use scripts for extended scene and gui transition effects
-Use a persistant ActionList, managed by the scene, to run effects in game.
-Combine a script and a simple state machine inside Game Objects to manage their actions.
-Use an ActionList in a Game Object to run ongoing behaviors and animation effects.
Common Commands
At first I thought that since Commands could execute any arbitrary code, I would probably end up writing dozens of them to create a good cinema. This turned out to be wrong in both MadStone and Primate Panic. I actually only needed a few important commands with 1 or 2 parameters each. Here are some of the main ones:
-Play music or a sound effect
-Change an image reference (such as the background)
-Add an ActionEvent to an ActionList/ActionQueue
-Enable/disable an ActionEvent
—
Ever since I invented the Scripted Event System, we’ve used it in dozens of different places throughout each of our games. Combined with the Behavior System and Robot Functions, it has saved me countless weeks of programming and allowed me to take on tasks that I had previously thought were way beyond my reach. I like the system so much that I plan to use it in every game that we make in the future.
I hope you enjoyed this article, thank you for reading!


